


What's
involved in a major rebuild of an MGBV8?  Following a major restoration of an MGBGTV8 previously owned by Dugald McNeill, Mike Macartney met up with his old |
friend and as
Dugald was so attached to the car, Mike generously let it go back
to him! But Mike had thoroughly enjoyed driving the V8 so the MGV8
bug had bitten him! We soon heard Mike had bought another MGV8 for
restoration, a V8 Roadster conversion. As he was preparing the car
to start the restoration Mike then offered to send in regular reports
of the restoration which you can follow here. See the latest
report & Index See our reports of earlier rebuild projects. More |
 |
 Rebuild project begins Mike Macartney with Teal Blue 1334 in a sad state before a major restoration. 130601 More |
 Project completed Mike proudly had the MGBGTV8 on display at a car show and then at MGLive! 2014. 140603 More |
 Rebuild report 1 Mike's report on buying a new restoration project, a V8 Roadster. 150104 More |
 Rebuild report 2 Initial clean up begins with the boot and engine bay. 150115 More |
 Rebuild report 3 Filler was not covered immediately with a waterproof paint coat during previous repair. 150119 More |
 Rebuild report 4 Checking with plasticine that the EFi bits will fit under the bonnet. 150120 More |
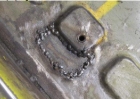
 Rebuild report 5 Removed sound deadening tar from the floor to see what lurked beneath. Guess what I found? - rust. 150121 More |
 Rebuild report 6 Best bit of kit I have ever bought for £300 is a Hydrovane compressor, Gunson bead blaster and filter system. 150122 More |
 Rebuild report 7 Work resumes on inner wing holes for the exhaust, the steering column and rust under seam sealer. 150130 More |
 Rebuild report 8 Managing the nuts and bolts is essential - bag them up and mark where they come from. 150204 More |
 Rebuild report 9 Checking wheels and suspension geometry, tyre choice and a new RV8 engine & gearbox. 150208 More & Drawing |
 Rebuild report 10 Removing the dashboard, heater and legwell trim, marking the parts and cleaning up ready for welding. 150211 More |
 Rebuild report 11 Problems with an interior light, sorting parts and preparing for an engine-out. 150220 More |
 Rebuild report 12 Engine comes out and then cutting the bulkhead to make room for the engine. 150224 More |
 Rebuild report 13 Attacking the rust in the floor pan and preparing to fit the new engine mounts. 150226 More |
 Rebuild report 14 Serious welding and discovery of rust sections. 150226 More |
 Rebuild report 15 Trial fit of the engine, visit to Stoneleigh show and rear GRP valance panel. 150303 More |
 Rebuild report 16 Checking the RV8 wiring loom and tracing a wiring diagram. Tidying up the workshop. 150307 More |
 Rebuild report 17 Steering rack, gearbox mountings and cutting a hole in the inner wing for the exhaust. 150311 More |
|
 Rebuild report 19 Fellow V8 member has an spit idea and progress with the steering rack. 150319 More |
 Rebuild report 20 Repositioning the remote oil filter, cooling fan options and dealing with rack issues. 150323 More |
 Rebuild report 21 Sorting out the wiring & ensuring a clear area behind the grille for good cooling. 150325 More |
 Rebuild report 22 More sorting the wiring, twin fan brackets and more on the wiring loom. 150401 More |
 Rebuild report 23 ECU brackets, panel beating tools & engine mounts. 150404 More |
 Rebuild report 24 Engine mounting plates, gearbox crossmember points and spit arrives. 150409 More |
 Rebuild report 25 Kurust at work, more spot welding &removing sound deadening to check for rust. 150412 More |
 Rebuild report 26 Positioning the rack and checking the exhaust manifold clearances. 150415 More |
 Rebuild report 27 Fitting the ECU mounting rivet nuts and setting up the exhaust mounting. 150419 More |
 Rebuild report 28 More work on the exhaust pipe routing and Kurust treatement before primer. 150422 More |
 Rebuild report 29 Back to the exhaust system and the rubber mountings and how to fix them. 150427 More |
 Rebuild report 30 More on fuel injection wiring, bonnet hinges and exhaust mounting clamps. 150430 More |
 Rebuild report 31 Removing spot welds, tail pipe mounts and a mounting plate for the fuse box. 150503 More |
 Rebuild report 32 Treating rust areas by the battery box, fuse box mounting and exhaust. 150509 More |
 Rebuild report 33 Took off the RH front wheel cylinder, found the pistons seized solid. 150519 More |
 Rebuild report 34 Making an air filter collar and a hole for it through the radiator mounting panel. 150529 More |
 Rebuild report 35 Using a plastic battery box, fitting oxygen sensors and several useful tips. 150605 More |
 Rebuild report 36 Made a decision to run the battery cable and other cables inside the car. 150612 More |
 Rebuild report 37 Patch with collar welded into it for the oxygen sensor on the exhaust down pipe. 150614 More |
 Rebuild report 38 Making swirl pot on the lathe and the outlet in the section of exhaust pipes. 150618 More |
 Rebuild report 39 Swirl pot set at an angle so the petrol does not have to go up hill. 150623 More |
 Rebuild report 40 Making a mounting plate for a battery cut off switch & pressure testing the swirl pot.150707 More |
 Rebuild report 41 Dugald helps put the "spit" together but where are the assembly instructions?. 150717 More |
 Rebuild report 42 More progress putting the spit together, welding up and fitting castors.150721 More |
 Rebuild report 43 Modifying the bonnet is underway - but a crab lunch was very tempting. 150725 More |
 Rebuild report 44 Adjusting the doors so that they open & close nicely and a list of what's to be done. 150803 More |
 Rebuild report 45 Good news, rebuild is underway again setting up the spit mounting brackets. 160528 More |
 Rebuild report 46 Adjustments to the spit and cleaning the underside of the shell. 160606 More |
 Rebuild report 47 Time to start attacking the underside of the body. Drilled the holes for the oil filter 160608 More |
 Rebuild report 48 With the shell away for soda blasting, progress with some of the other work. 160612 More |
 Rebuild report 49 Shell has returned from Soda Blast with a free two pack undercoat.. 160620 More |
 Rebuild report 50 Continuing cutting and welding work on the area around the splashguard. 160623 More |
 Rebuild report 51 Dugald visited me for a couple of days and did his first bit of welding for 50 years! 160628 More |
 Rebuild report 52 The next major part to rebuild is the area at the top of the RH front inner wing. 160701 More |
 Rebuild report 53 Jacking points are another area for mud to build up.. 160702 More |
 Rebuild report 54 More repairs to areas of the bodyshell continue.. 160708 More |
 Rebuild report 55 Continuing to make the panel that will meet the glass fibre rear bumper. 160710 More |
 Rebuild report 56 Lurking underneath is 'Golden Body Lightener' better known as RUST. 160714 More |
 Rebuild report 57 Mounting for the Panhard rod, part of the Frontline suspension upgrade kit. 160717 More |
 Rebuild report 58 Mike often mentions his muleskinner - it's a wire brush encapsulated in resin. 160721 More |
 Rebuild report 59 Work on the Quaife and then Mike is back on the rear bodywork again. 160725 More |
 Rebuild report 60 Mike starts making plates to bolt to his new engine mounting points. 160730 More |
 Rebuild report 61 Getting a good fit for the chrome grille and fitting the valance.160802 More |
 Rebuild report 62 Bodywork painting set for 12th September so on with the repairs to the shell. 160804 More |
 Rebuild report 63 Sorting out the grille opening and fitting the glassfibre valance unit. 160806 More |
 Rebuild report 64 More work on the grille fit and bonnet and Dugald due to visit for fitting the suspension. 160810 More |
 Rebuild report 65 Dugald preparing the rear axle ready to fit the 5 link rear suspension from Frontline. 160814 More |
 Rebuild report 66 Some door adjustment is available on the hinges, but it is limited so more work. 160818 More |
 Rebuild report 67 Much going on including remaking the area where the indicators & side lights will fit.160821 More |
 Rebuild report 68 Ready to cut the front wing to bring it to bonnet level. The grille fit looks good. 160825 More |
 Rebuild report 69 Welding suspension mounts and making patterns for sidelight fixing holes. 160826 More |
 Rebuild report 70 Filler applied to the boot lid and rubbed down with grit production paper. 160831 More |
 Rebuild report 71 Rubbing down the primer on the underside, and inside of the bodyshell. 160908 More |
 Rebuild report 72 Thought it would be useful to try this product and report how I got on with it. 160911 More |
 Rebuild report 73 All ready on the trailer to go to Jaymic for painting the bodyshell in Teal Blue. 160913 More |
 Rebuild report 74 Bolted all the 'U' bolts to check the brackets settled into their correct places. 160916 More |
 Rebuild report 75 Next jobs are what to do with the dashboard, instruments and other bits. 160921 More |
 Rebuild report 76 The shuttle valve finally blown out of its bore with compressed air.160926 More |
 Rebuild report 77 Plenty of rubber grease for pushing the new calliper pistons into the bores. 161004 More |
 Rebuild report 78 Shell is back painted in Teal Blue and ready for continuing the rebuild. 161007 More |
 Rebuild report 79 The painted bodyshell is now back in the garage - now where to start?161010 More |
 Rebuild report 80 Two stainless steel caster reduction plates on the crossmember. 161014 More |
 Rebuild report 81 Heater appears to have a two speed fan. Casing was given the Kurust treatment. 161021 More |
 Rebuild report 82 Dugald bolting the drilled angle brackets onto the spit's swivelling part. 161024 More |
 Rebuild report 83 The foam ring that glues to the heater casing seals the heater casing from the bulkhead. 161026 More |
 Rebuild report 84 The door switch for the interior light fitted to the A-post with stainless steel screws. 161029 More |
 Rebuild report 85 At last I am ready to start injection the Waxoyl cavity proofing on the bodyshell. 161101 More |
 Rebuild report 86 This was the first section of sound deadening material called "Peace Mat". 161102 More |
 Rebuild report 87 All the bulb sockets and springs have been brushed with Vaseline. 161106 More |
 Rebuild report 88 The plastic headlamp buckets problem - I decided to solve the problem. 161108 More |
 Rebuild report 89 The next job is to fit the fuel pump, filters and fuel lines. Not a lot of spare space. 161109 More |
 Rebuild report 90 Tube bender will take three different sizes of tube for the fuel & brake lines. 161114 More |
 Rebuild report 91 Pleased with the results of the 'plumbing' but it has taken more time than I expected. 161116 More |
 Rebuild report 92 Fitting the vinyl trim, Jane used a roller to push it onto the scuttle panel. 161118 More |
 Rebuild report 93 Steering column - three bolts that support the column were tightened up. 161120 More & Note |
 Rebuild report 94 New crossmember end plate - who needs fireworks when you've a MIG welder?161121 More |
 Rebuild report 95 Front cross member bolted to the chassis rails, easier with the body on the spit. 161125 More |
 Rebuild report 96 Dugald helps make good progress. Switch for the boot interior lamp cleaned up. 161127 More |
 Rebuild report 97 Cutting & fitting sound deadening panels which were stuck in place. A long job. 161130 More |
 Rebuild report 98 The bolts holding the pulley on the water pump were very tight. 161205 More |
 Rebuild report 99 Water pump pulley and crankshaft belt pulley were blasted and treated with Kurust. 161209 More |
 Rebuild report 100 Cleaning the rocker covers, petrol tank and steering column and rack. 161217 More & 100 |
 Rebuild report 101 It's starting to look more like a complete RV8 3.9 EFi engine. 161219 More |
 Rebuild report 102 Only one of the five screws on the windscreen would unscrew. 161221 More |
 Rebuild report 103 No LT77 gearknobs available I found a VW one at £3.50! 161222 More |
 Rebuild report 104 Sound deadening fitted inside the boot lid. 161227 More |
 Rebuild report 105 Propshaft bolted to the diff with new SS Nyloc nut. 161230 More |
 Rebuild report 106 New steering column mounting bracket ready to be fitted. 170104 More |
 Rebuild report 107 The steering rack fits the new mounting brackets. 170106 More |
 Rebuild report 108 Broken bracket of the anti rattle cap of the gearbox remote. 170109 More |
 Rebuild report 109 Arrow to the Adjustment screw on the Mass Airflow Meter. 170112 More |
 Rebuild report 110 Sender unit locked in place using with locking pegs. 170114 More |
 Rebuild report 111 Brake pads with retaining sprung clips in place. 170118 More |
 Rebuild report 112 I laid it out the carpet set from Moss to see which bits fitted. 170122 More |
 Rebuild report 113 Jane helped fit the bonnet release spring to the alloy bonnet. 170127 More |
 Rebuild report 114 Jane fitted the stainless bolts to fix the centre of the screen. 170131 More |
 Rebuild report 115 Few problems bolting the hood frame to the bodyshell. 170203 More |
 Rebuild report 116 Not too happy about the fit of the rear carpet. 170208 More |
 Rebuild report 117 Front of the boot lid, the lid is sitting about 1/8" too high. 170211 More |
 Rebuild report 118 Centre console gear stick hole with a strengthening plate. 170216 More |
 Rebuild report 119 View of the brake fail switch on the dual master cylinder. 17019 More |
 Rebuild report 120 Broken plastic on the vacuum pipe for the distributor. 170222 More |
 Rebuild report 121 Sealant under the front lip of the rubber windscreen seal. 170224 More |
 Rebuild report 122 Manifold wrapped with black exhaust paint. 170226 More |
 Rebuild report 123 Mesh grille to stop leaves blocking the drain pipe. 170302 More |
 Rebuild report 124 Relays save high electrical loads on switches. 170305 More |
 Rebuild report 125 Two springs were moved over the prongs on the gearstick. 170311 More |
 Rebuild report 126 Photo shows the wires connected to the relay. 170313 More |
 Rebuild report 127 Inside the indicator switch unbolted from its backing plate. 170320 More |
 Rebuild report 128 A new indicators switch arrived but the hole is too small! 170328 More |
 Rebuild report 129 Sketching out a section of the wiring diagram. 170331 More |
 Rebuild report 130 Yellow and white wires go to the speed transducer. 170401 More |
 Rebuild report 131 Drawing the wiring loom I noted the positions, colours & destinations of the wires. 170412 More |
 Rebuild report 132 One of the circuits I did not check was the light switch on the steering column. 170423 More |
 Rebuild report 133 Dugald's plan for how to wire an override switch for the radiator fans. 170507 More |
 Rebuild report 134 Arrow points to the voltage stabiliser. Note that it is the old one. 170513 More |
 Rebuild report 135 New bracket for the washer bottle was made and bolted in position. 170520 More |
 Rebuild report 136 Next, I have to cut the hole in the carpet for the gear stick. 170423 More |
 Rebuild report 137 Positioning the front numberplate supported by bespoke brackets. 170524 More |
 Rebuild report 138 With the contact adhesive touch dry the carpet edge was folded over. 170525 More |
 Rebuild report 139 The cables can now be attached to the heater control switches. 170528 More |
 Rebuild report 140 Problem - spotted the 'ear' on the radiator cap would foul the bonnet hinge! 170530 More |
 Rebuild report 141 Radiator cap adjusted to remove the fouling with the bonnet hinge. 170602 More |
 Rebuild report 142 Iinside is now virtually complete. Next job is to fit the steering wheel. 170607 More |
 Rebuild report 143 A battery powered air fed mask for painting suspension parts. 170608 More |
 Rebuild report 144 Photo of the MG gives me some motivation to get on with the rebuild tomorrow. 170611 More |
 Rebuild report 145 Lubricated the pivot bushes with silicone grease before fitting them in place. 170614 More |
 Rebuild report 146 New oil pipe from the dashboard oil pressure gauge to the oil filter fitted. 170616 More |
 Rebuild report 147 Bleeding the brakes using the Gunson EEZIBLEED system is quite simple. 170621 More |
 Rebuild report 148 The engine started on the first turnover. What a relief - the V8 exhaust note. 170624 More |
 Rebuild report 149 I surrounded the clutch master cylinder with paper roll in case there's a brake fluid.170627 More |
 Rebuild report 150 Clipped the heat shield onto the exhaust pipe and used stainless steel locking wire. 170701 More |
 Rebuild report 151 In the degreaser bath, a scrub with a brass brush and window regulari looks new. 170705 More |
 Rebuild report 152 These new striker plates look as if they be better than the originals. 170707 More |
 Rebuild report 153 I started fitting securing pin to the handle before I fitted the handle to the shaft. 170711 More |
 Rebuild report 154 After an hour trying to fit the heater controls I gave up and let Jane have ago. 170714 More |
 Rebuild report 155 With more or less equal door shuts the screws could be finally tightened. 170717 More |
 Rebuild report 156 New door locks arrived yesterday. The method of fixing seemed to me a lot better. 170722 More |
 Rebuild report 157 Make sure this screw has plenty of Copperslip grease on it to stop it seizing up. 170725 More |
 Rebuild report 158 The hood isn't brilliant but it will do for the time being with a few years life left. 170729 More |
 Rebuild report 159 Today is MOT day. I still get nervous taking cars in for an MOT test. Passed. 170801 More |
 Rebuild report 160 Jane's first drive of the MGB. I think the big smile says she likes it!. 170810 More |
 Rebuild report 161 Mike has produced a 10 page detailed index to his series of reports.170823 More |
 Driving impressions Dugald MacNeill gives his impressions of driving the V8 Roadster Conversion. 180521 More |

